New feature: add column to a Data Source
From now on, it's possible to add new columns to existing Data Sources on Tinybird. This is how.

Business changes, so does data. New attributes in datasets are the norm, not the exception.
From today, you can add new columns to your existing Data Sources. You can do that without worrying about what happens with your existing data ingestion. We will keep importing data with the old schema and start accepting data for the new one.
While this sounds like an apparently basic feature, it is far from it! Since you can materialize data to other data sources at ingestion time, changing the schema of your data source could have downstream effects. We’ve made it so that you don’t have to worry about any of that.
There are only a few caveats you should take into account when adding columns to a Data Source. Read about them at the end of this post.
The old way
Imagine you had a Data Source called website_events that you wanted to add a new column to (e.g: ‘referer’). And let’s say that data source was receiving thousands of rows per second. In order to add a column without breaking the ingestion, you’d have to create a new Data Source website_events__v2 with the the extra column, and populate it with the old data via a Pipe.
The problem with this is that it duplicates your data, which is OK when you have a few million rows, but not great when you have billions of them.
The new way
You can do it via the CLI (docs here), the REST API (docs here) or the UI. Let’s say we have a Data Source like this originally:
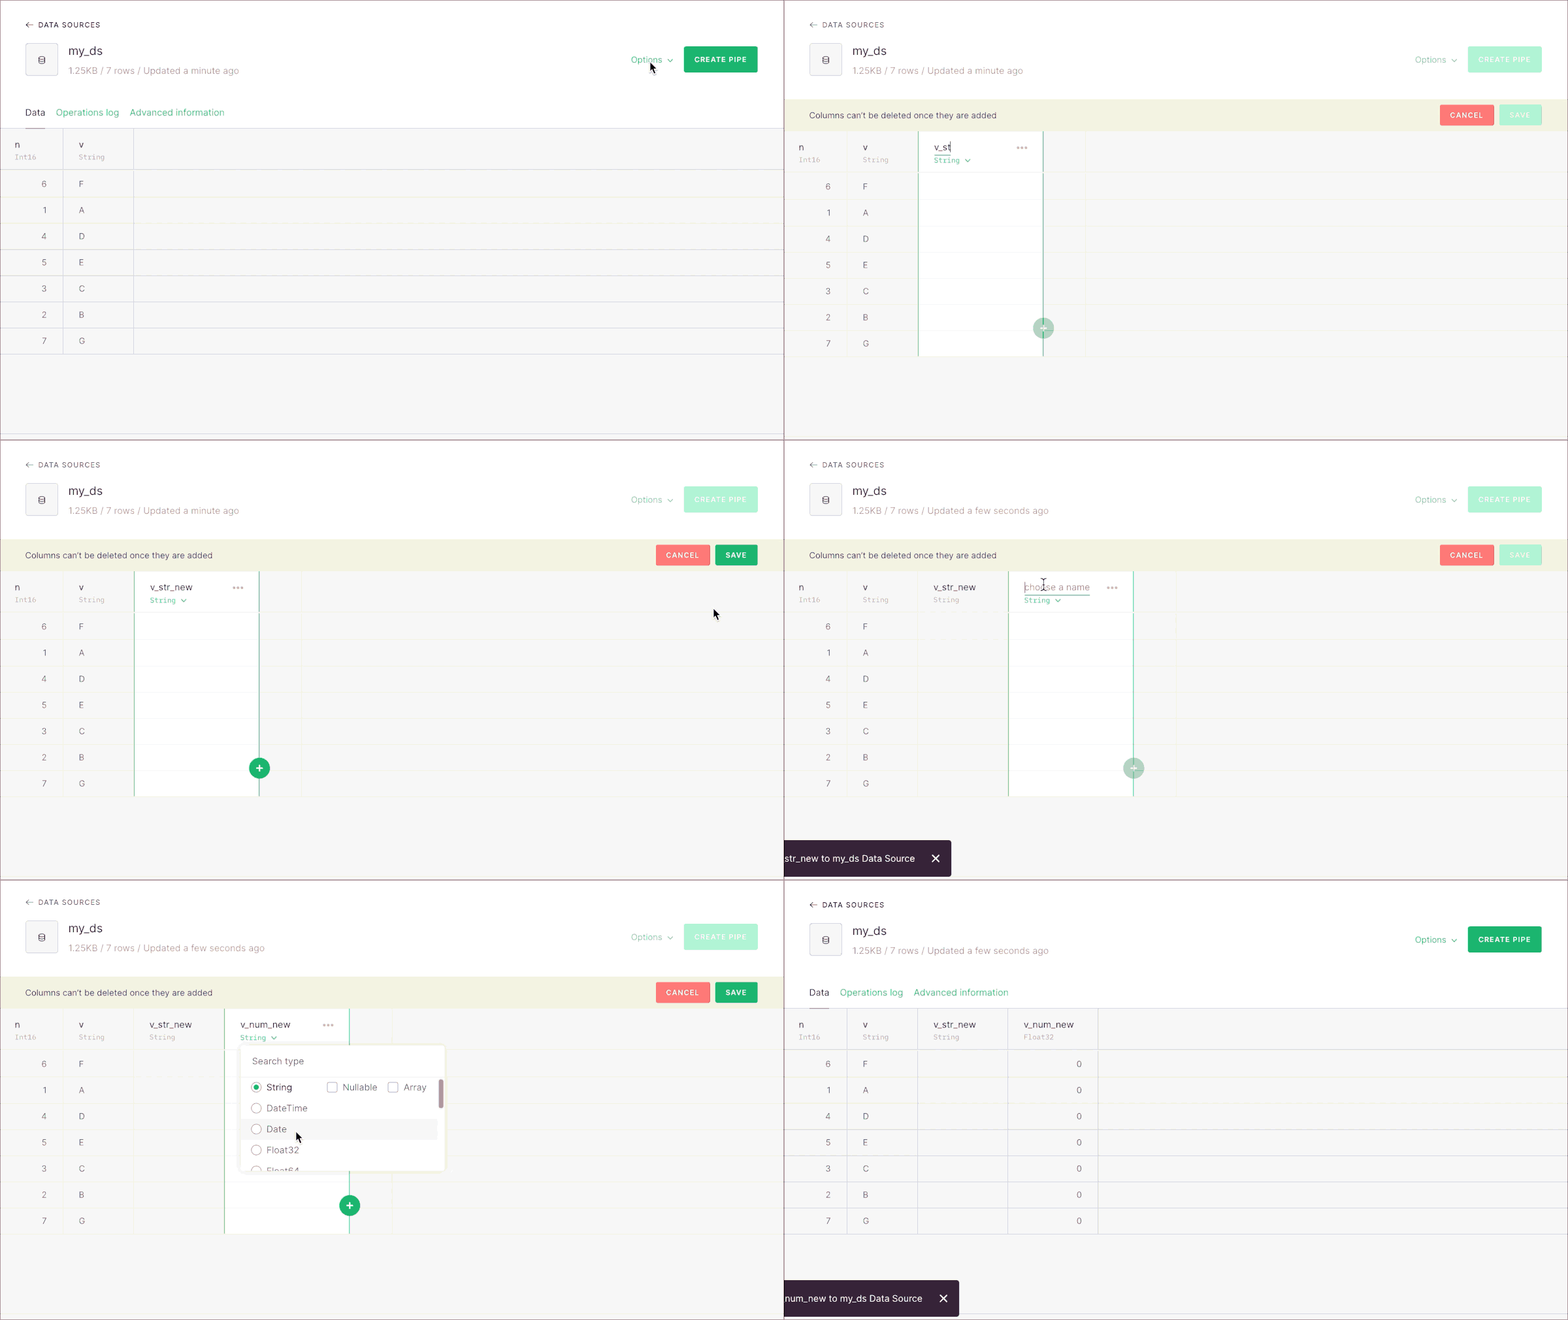
The UI lets you add new columns in a straighforward way:

By default columns will have an empty string or a 0, depending on the type. If you want to set up other default values for the new columns, you can use the CLI and our REST API.
Adding new columns via the CLI
This would be the datasource definition for the Data Source shown before:
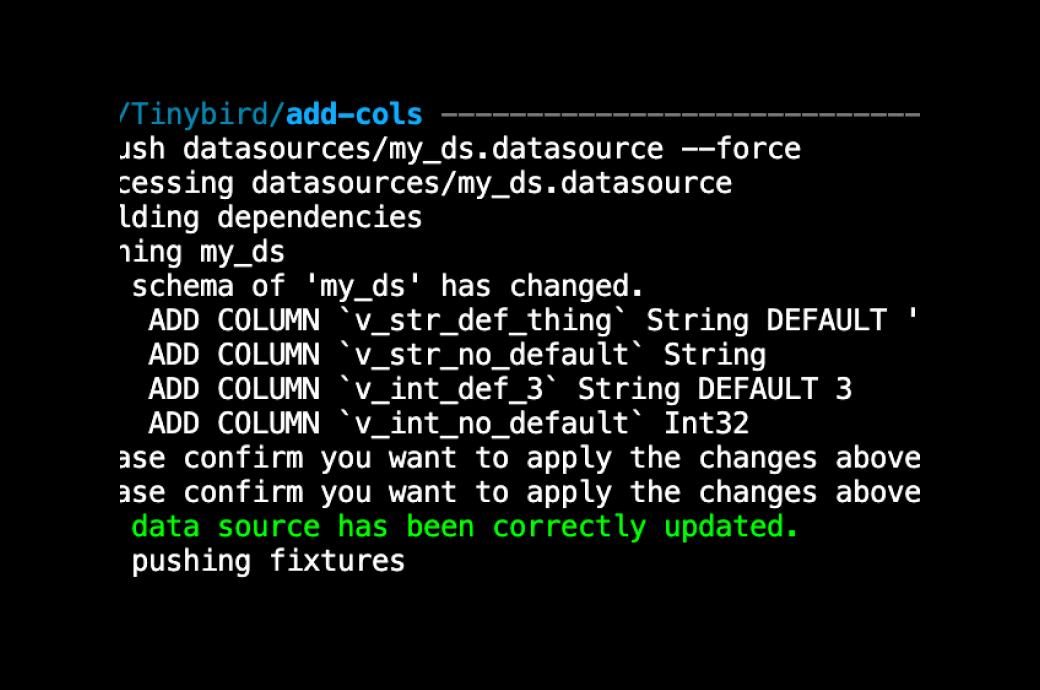
To add new columns, simply add them at the end of the current schema definition and then do tb push with the --force flag.
With the CLI and the REST API you can set different defaults for the new columns if you want. If you don’t, the new String columns will have an empty string as the default value, and numeric columns will have a default of 0. This way, your old imports can keep working without touching anything. Let’s add some columns with the CLI - this would be the new schema
Now when you push it’ll ask you for confirmation about the new columns:
And we can see now that the defaults have been properly populated:
Adding new columns via the REST API
The same that can be done via the CLI can be done with our API (as the CLI uses the REST API internally). The endpoint that lets you alter a Data Source is v0/datasources/{datasource_name}/alter.
To add new columns, you need to pass the full schema. This is the call you’d have to make to do what we’ve done before with the CLI:
Caveats
There are several things to consider, related to adding new columns to an existing Data Source:
- If you are materializing data from the data source you’re trying to add a column to with SELECT * FROM ..., they will break, because the target data sources won’t have those columns. To avoid this, use the column names instead of * when creating MVs.
- You can only add columns to Data Sources that have a Null engine, or one in the MergeTree family.
- You can keep importing data as if your schema hasn’t changed. We’ll just use the default values for the new columns if you don’t provide a value for them. At any point you can start importing with the new schema by sending new data that contains the new columns.
- All the new columns have to be added at the end of the schema of a current Data Source, not in between other existing columns.
Any comments, don’t hesitate to let us know!
